Captured a really big compound Marklin 4158/11 steam plant
Page 17 of 20
Posted: 9:01 PM - Nov 19, 2013
redryder
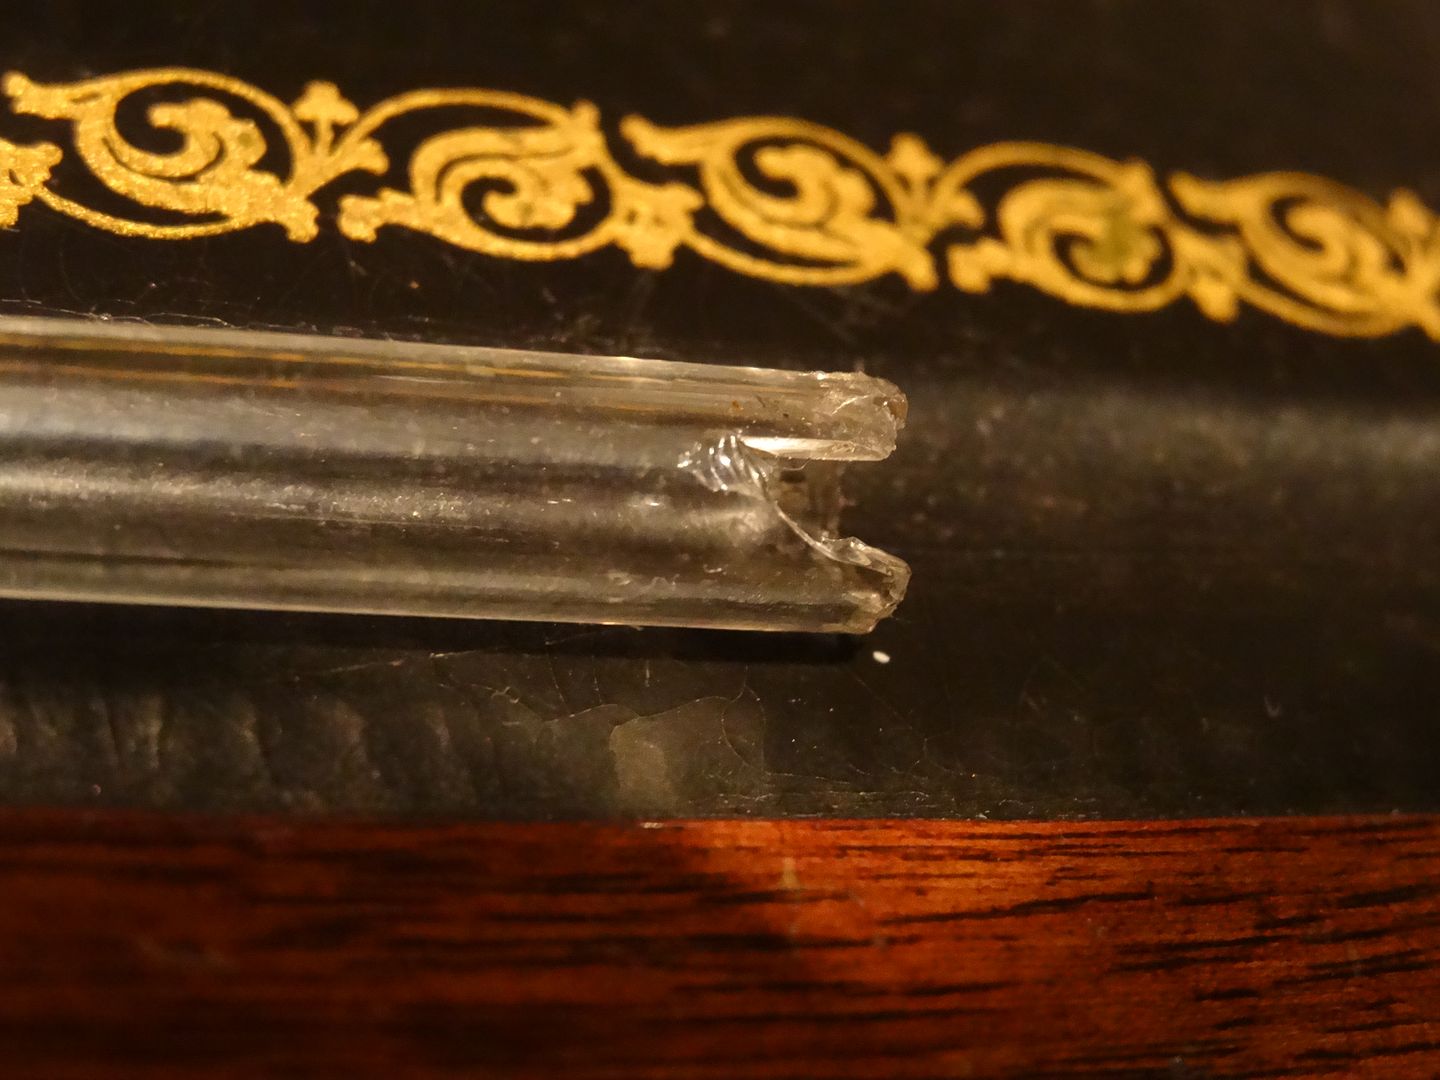
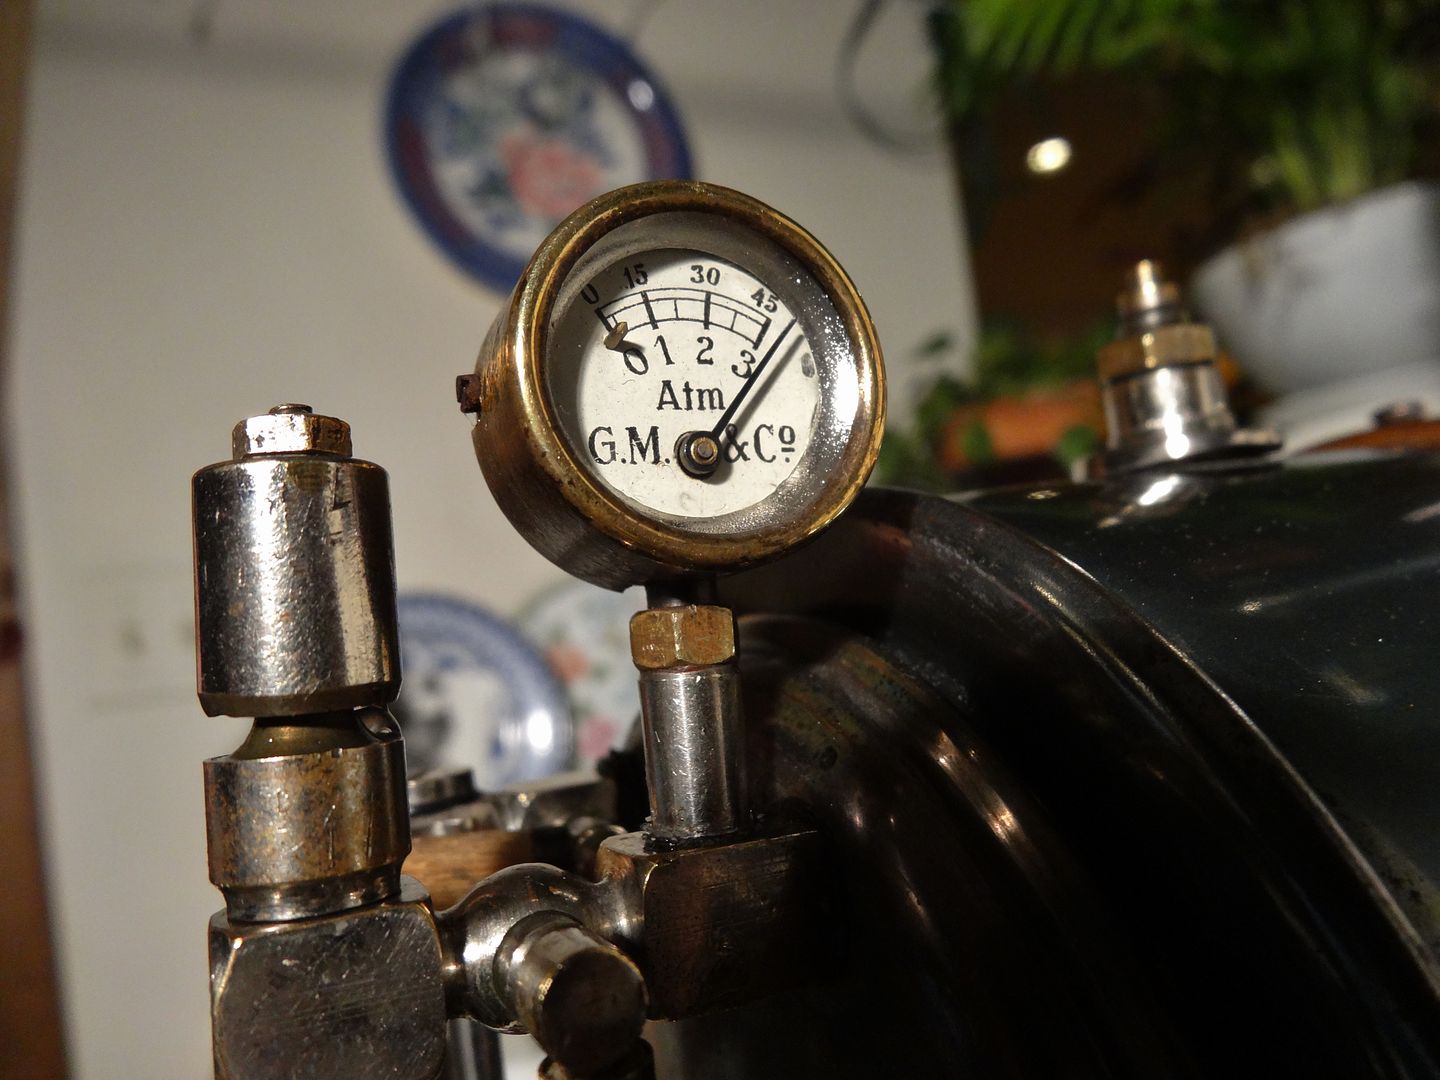
At the end of the last long run, it sprung a nasty steam and water leak.
This site glass tube is the culprit:
________________________________________
Posted: 9:10 PM - Nov 19, 2013
redryder
..........
I just got in a supply of 7 mm glass tubing and a cutter from Avagadros Lab Supply, Miller Place, New York.
Pyrex Borosilicate Tubing
7 mm x 61 cm - Five Pieces (24 inch lenths)
I have just made and installed a new site glass on my second attempt.
First piece broke as I tried to force it. In retrospect I might have had an easier time with a slightly smaller tube. 7 mm is the absolute maximum the fittings will take. I chose this as I felt it would make a better seal against the O-rings. The smaller size could allow a piece of the o-ring to pop out under heat and pressure.
Does anyone know if they used wood as a seal?
I have been asked this by a fellow collector.
Gil
________________________________________
Posted: 10:28 PM - Nov 19, 2013
Earlytimes
The engine looks Grand, Gil nice job!
As far as wood goes for a seal I haven't seen any on older engines that might be original..... I have seen a sort of dried putty that may be original.
I've used wood to seal things before .... a hole in a radiator in a pinch...
________________________________________
Posted: 5:31 AM - Nov 20, 2013
kno3
A beautiful engine! Does it use piston valves?
________________________________________
Posted: 6:19 AM - Nov 20, 2013
redryder
kno3:997081 wrote:A beautiful engine! Does it use piston valves?
It does not look like a piston valve rig.
Looks more like a D-valve but I cannot be sure.
It works perfectly, the machined surfaces don't leak, so I will not be taking it apart anytime soon.
Perhaps one of our Marklin experts could weigh in on this.
Gil
________________________________________
Posted: 7:13 PM - Nov 28, 2013
redryder
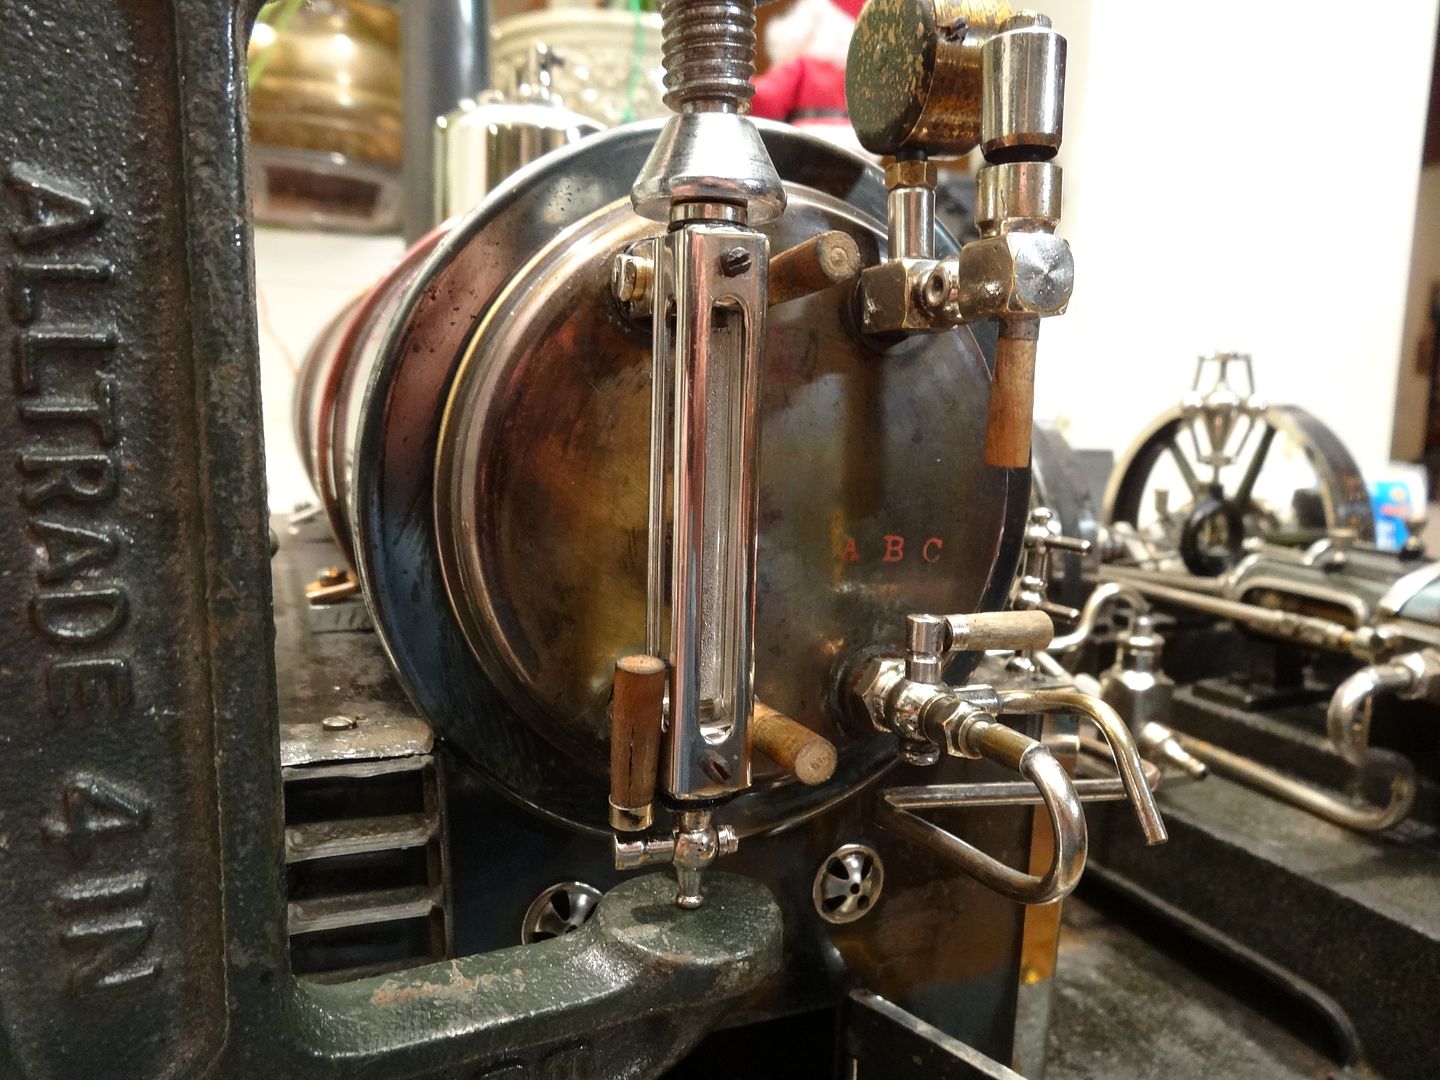
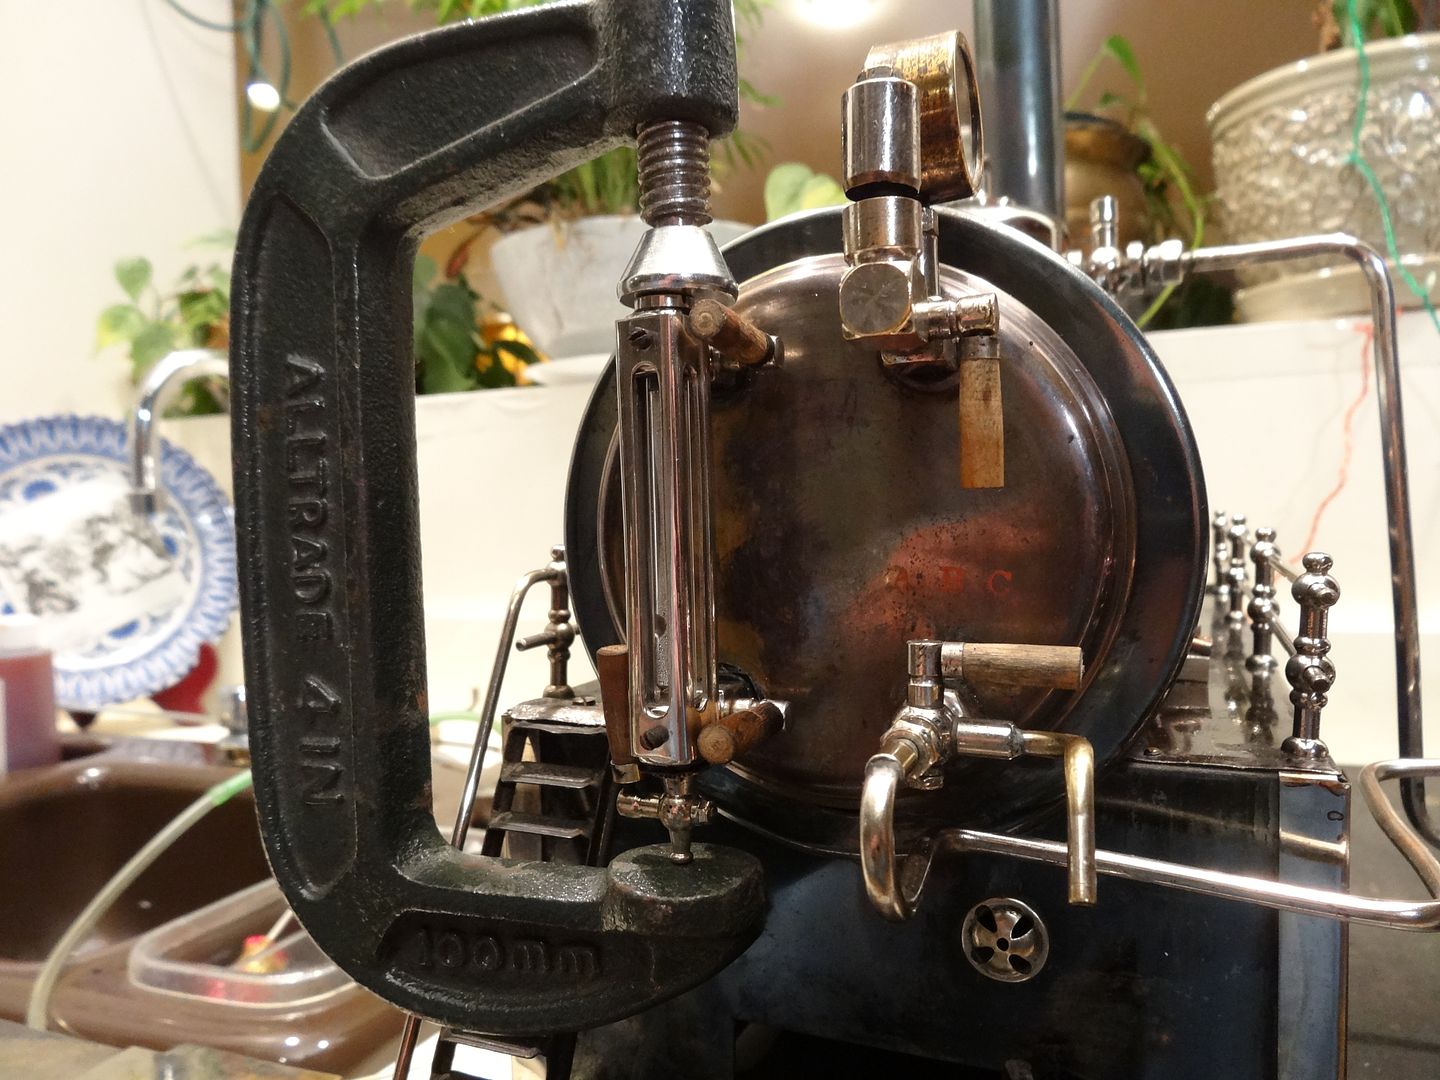
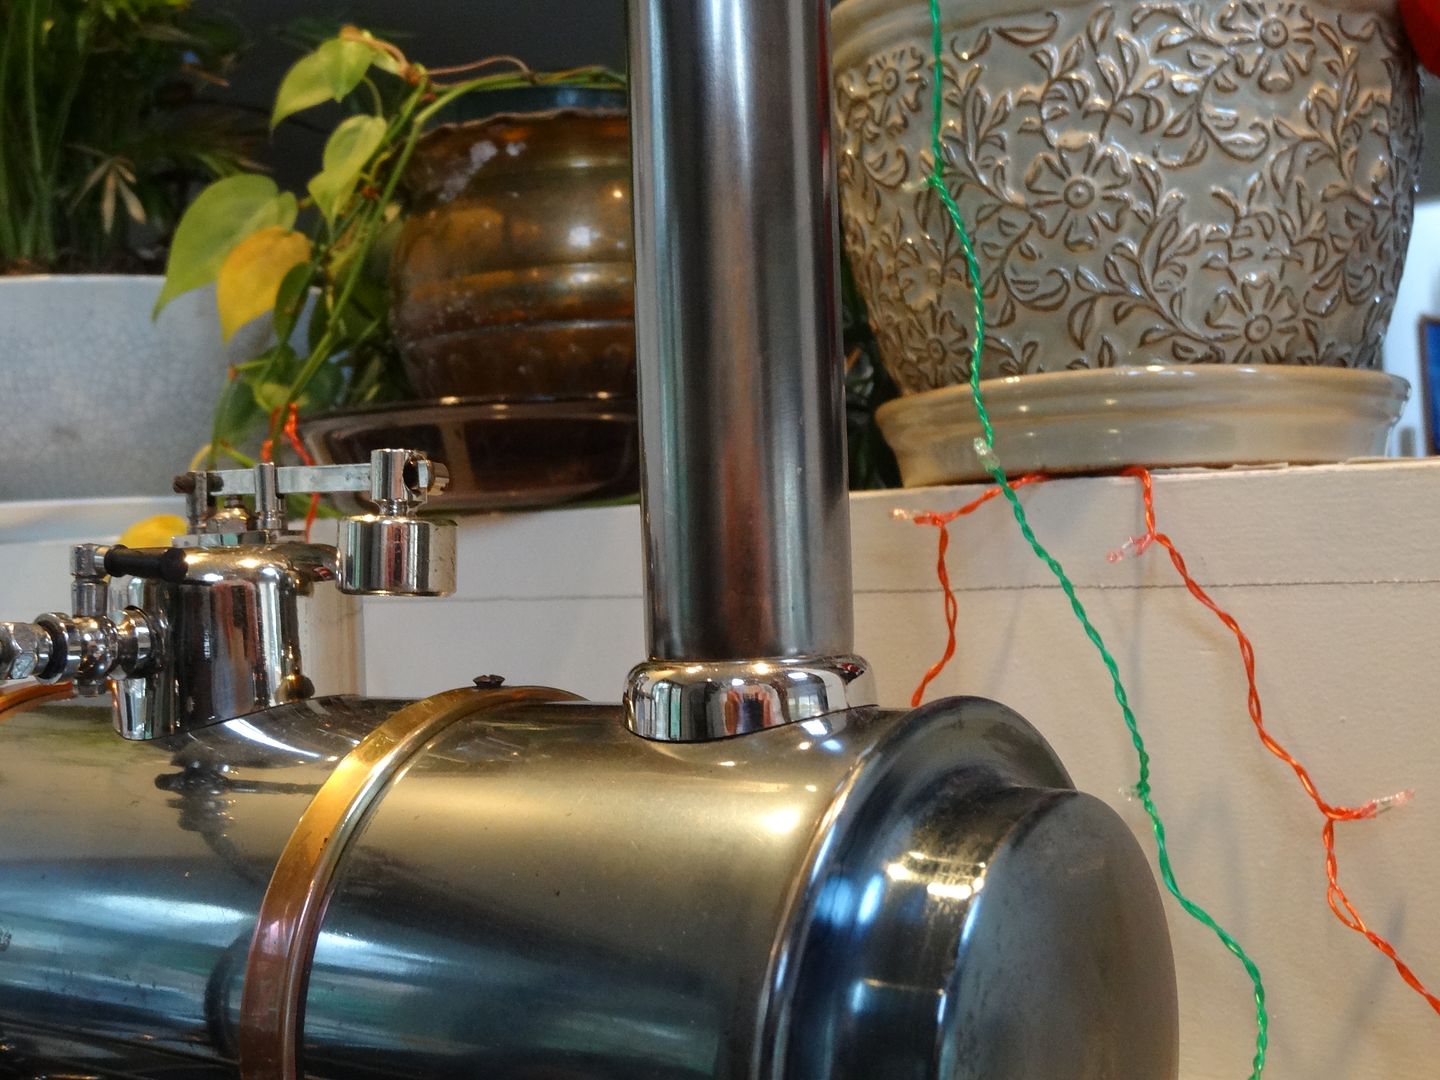
UPDATE:
A great big thank you to steamtoys who went out of his way to get someone to make
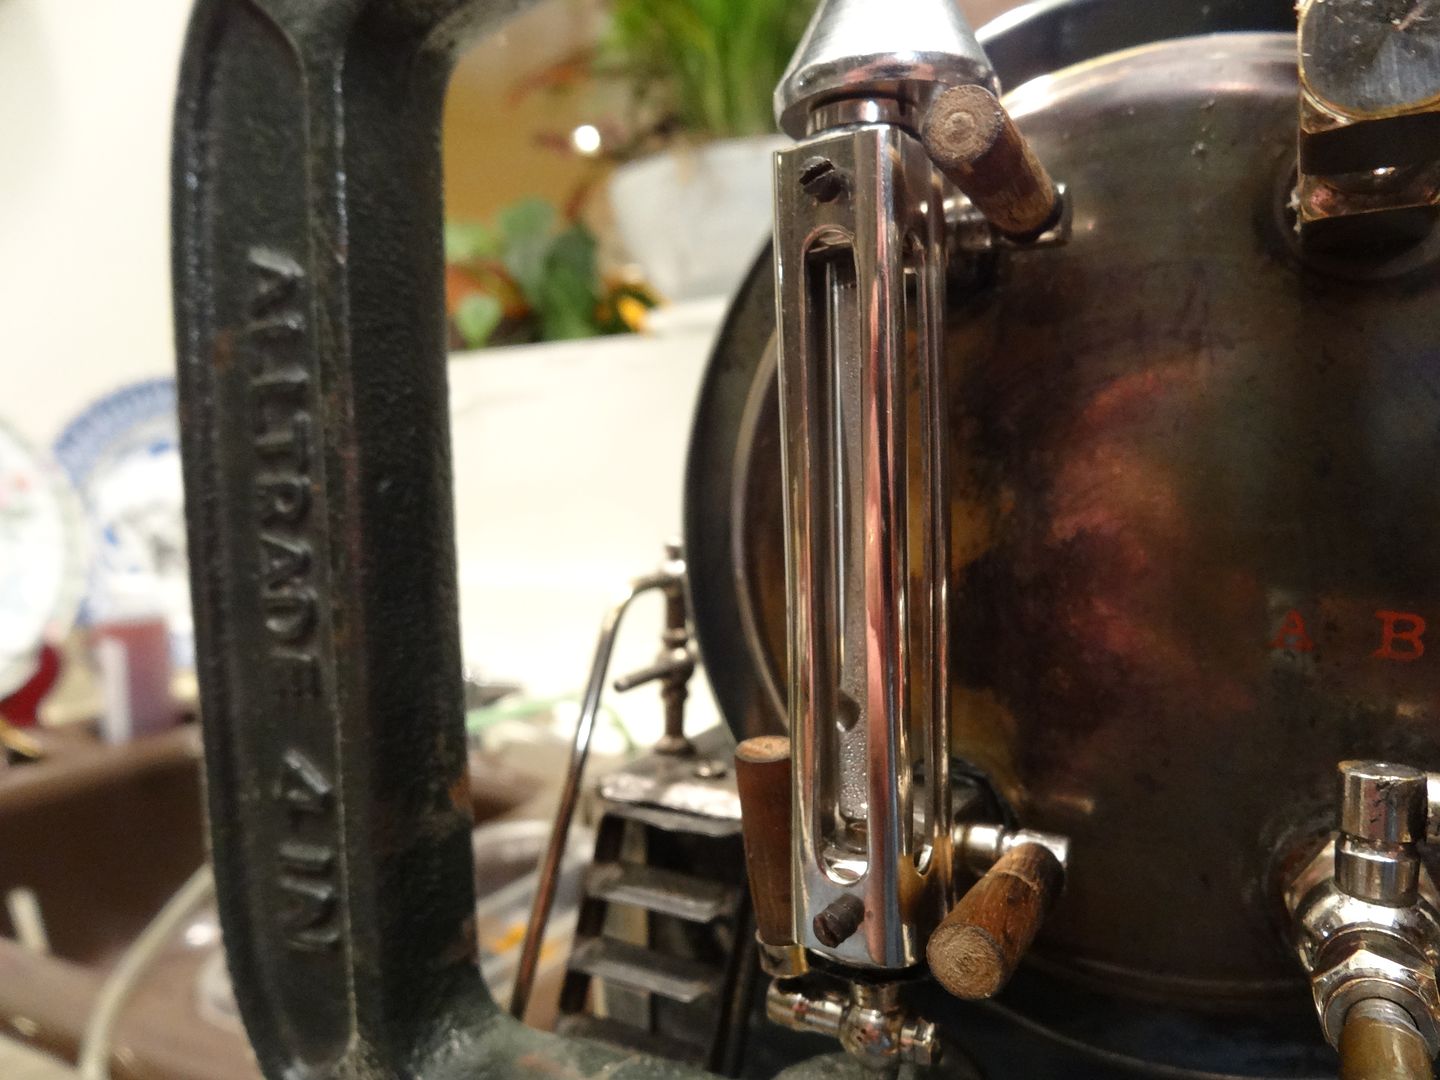
very nice copies of the correct original 3 sided slotted site glass guard.
The maker even nickel plated them and all for a nice reasonable price.
I drilled the holes a couple thousandths too close together for the express purpose of allowing
the site glass guard to help hold the fittings a hair closer together as they tend to spread apart vertically
as more pressure is applied to the glass when tightening on the o-ring seals. Below you will see
how I took up the difference with a C-clamp that I removed after installing tightening the
retaining screws. Then I gave it a good steam test to about 50 psi with no leaks!
Gil
________________________________________
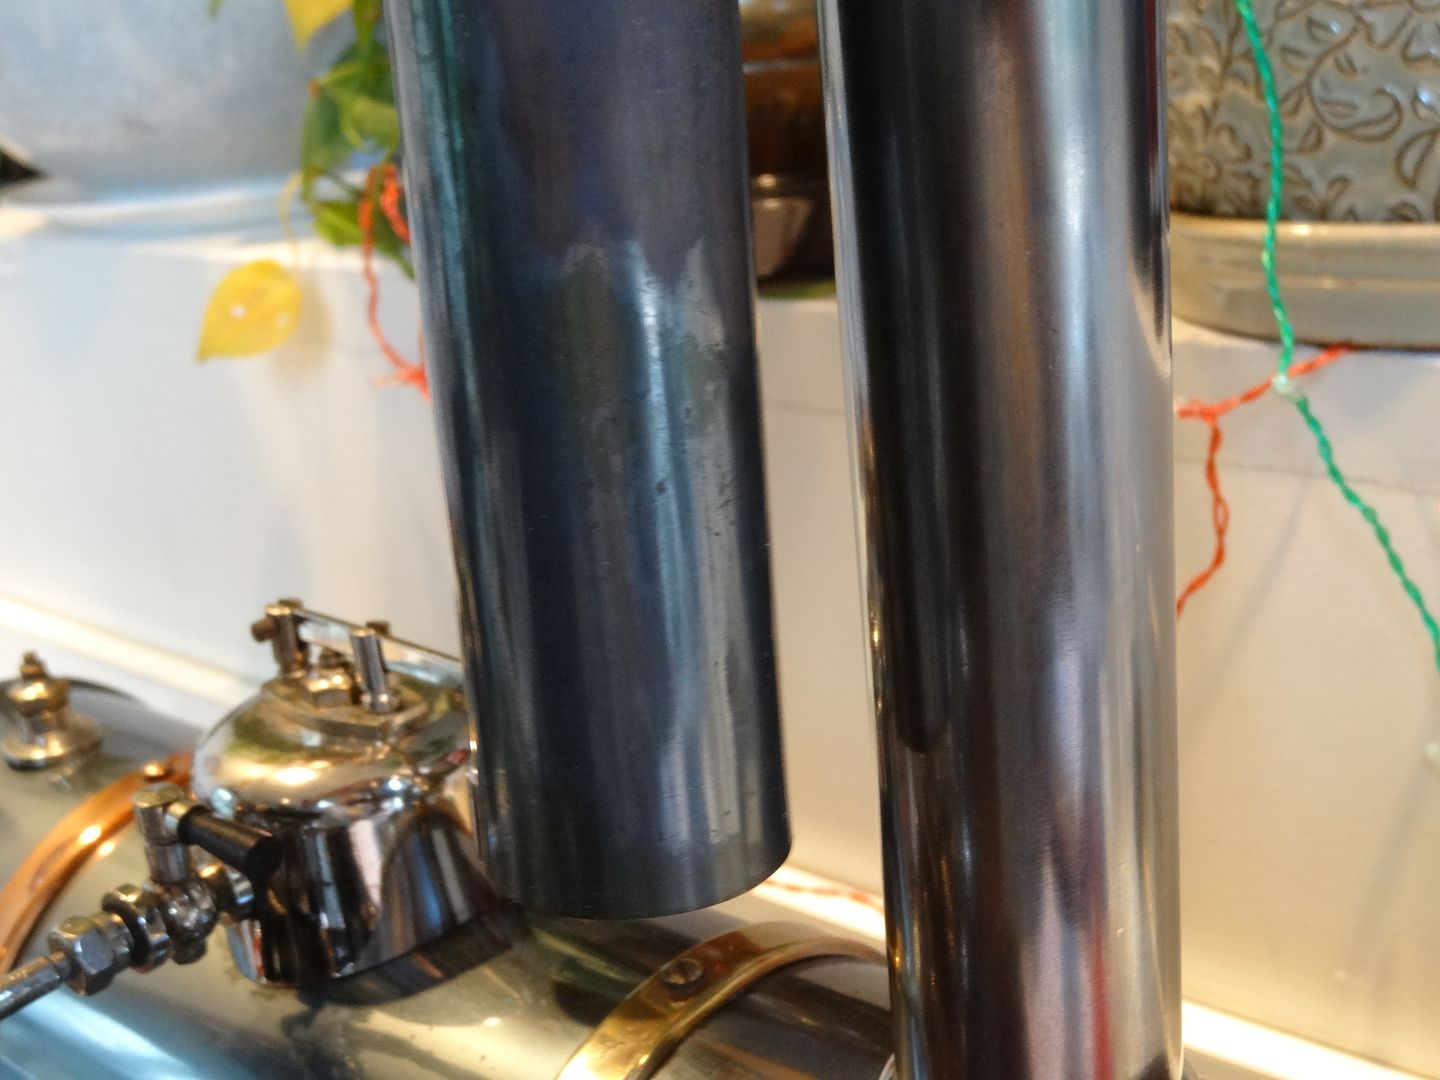
Posted: 7:14 PM - Nov 28, 2013
redryder
Here it is under pressure:
________________________________________
Posted: 7:32 PM - Nov 28, 2013
Earlytimes
Great job... a nicely made piece that looks original.
________________________________________
Posted: 1:39 AM - Nov 29, 2013
steamernick
Wow the transformation is quite magical! And that sight glass cover looks totally original! beautiful work! And yes you are correct, the engine uses a D type valve complete with tiny spring like things to keep the valve sealed against the port face
As far as i know, Schoenner, Falk, and Marklin were the only ones to use a "D"type
Valve.
________________________________________
Posted: 9:56 PM - Dec 07, 2013
redryder
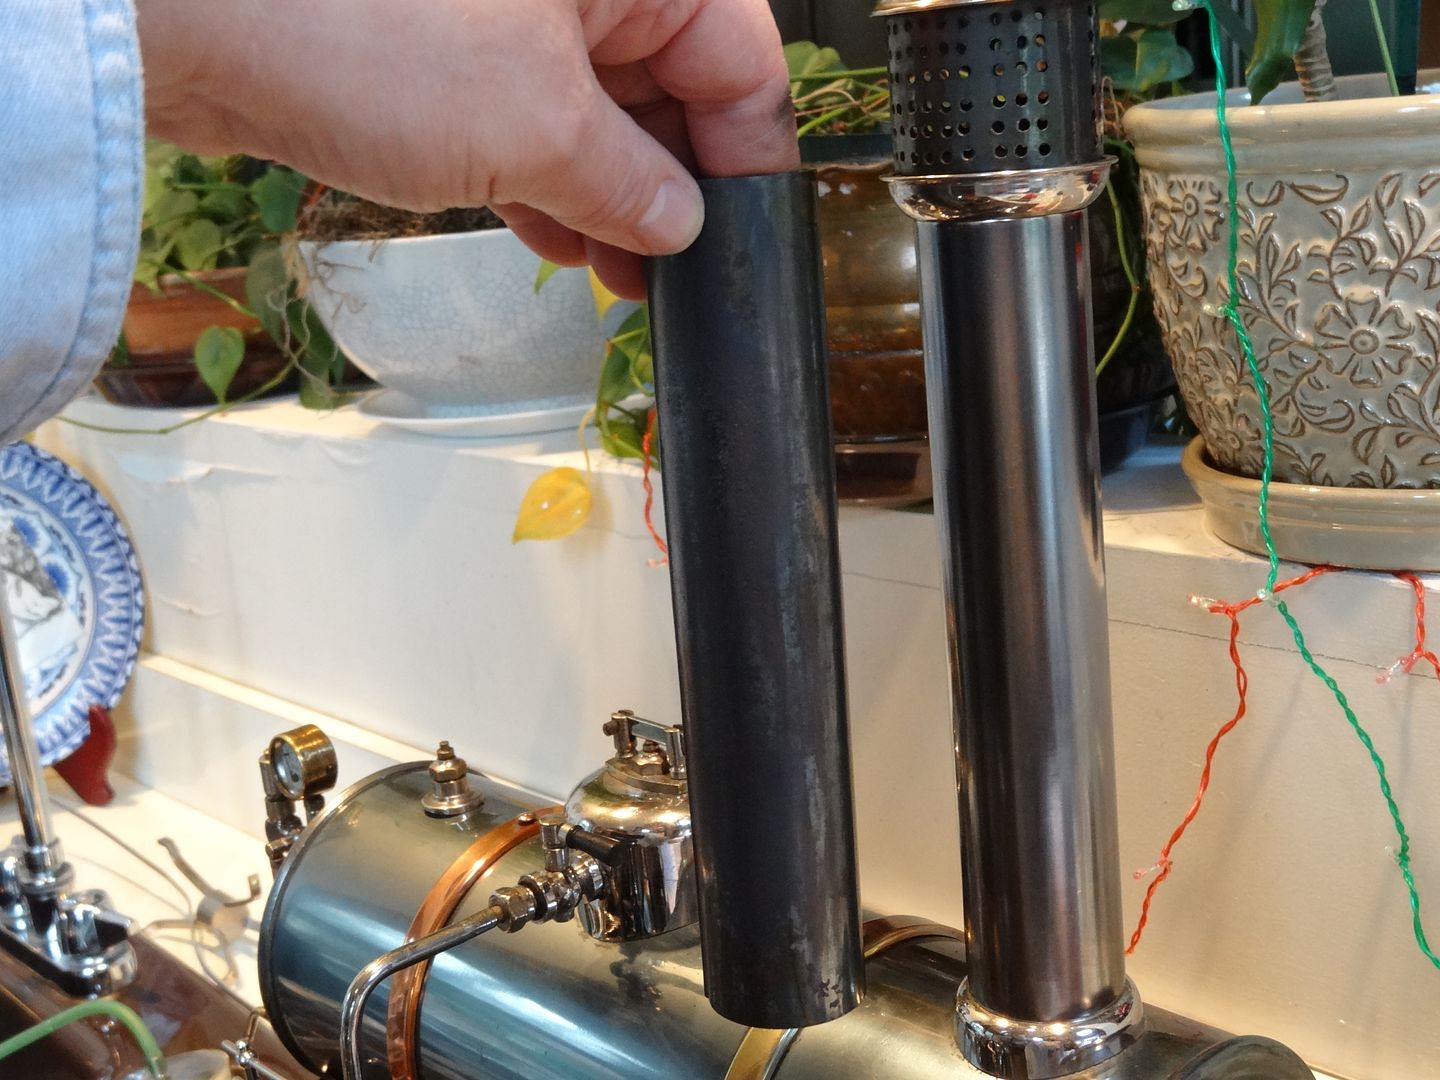
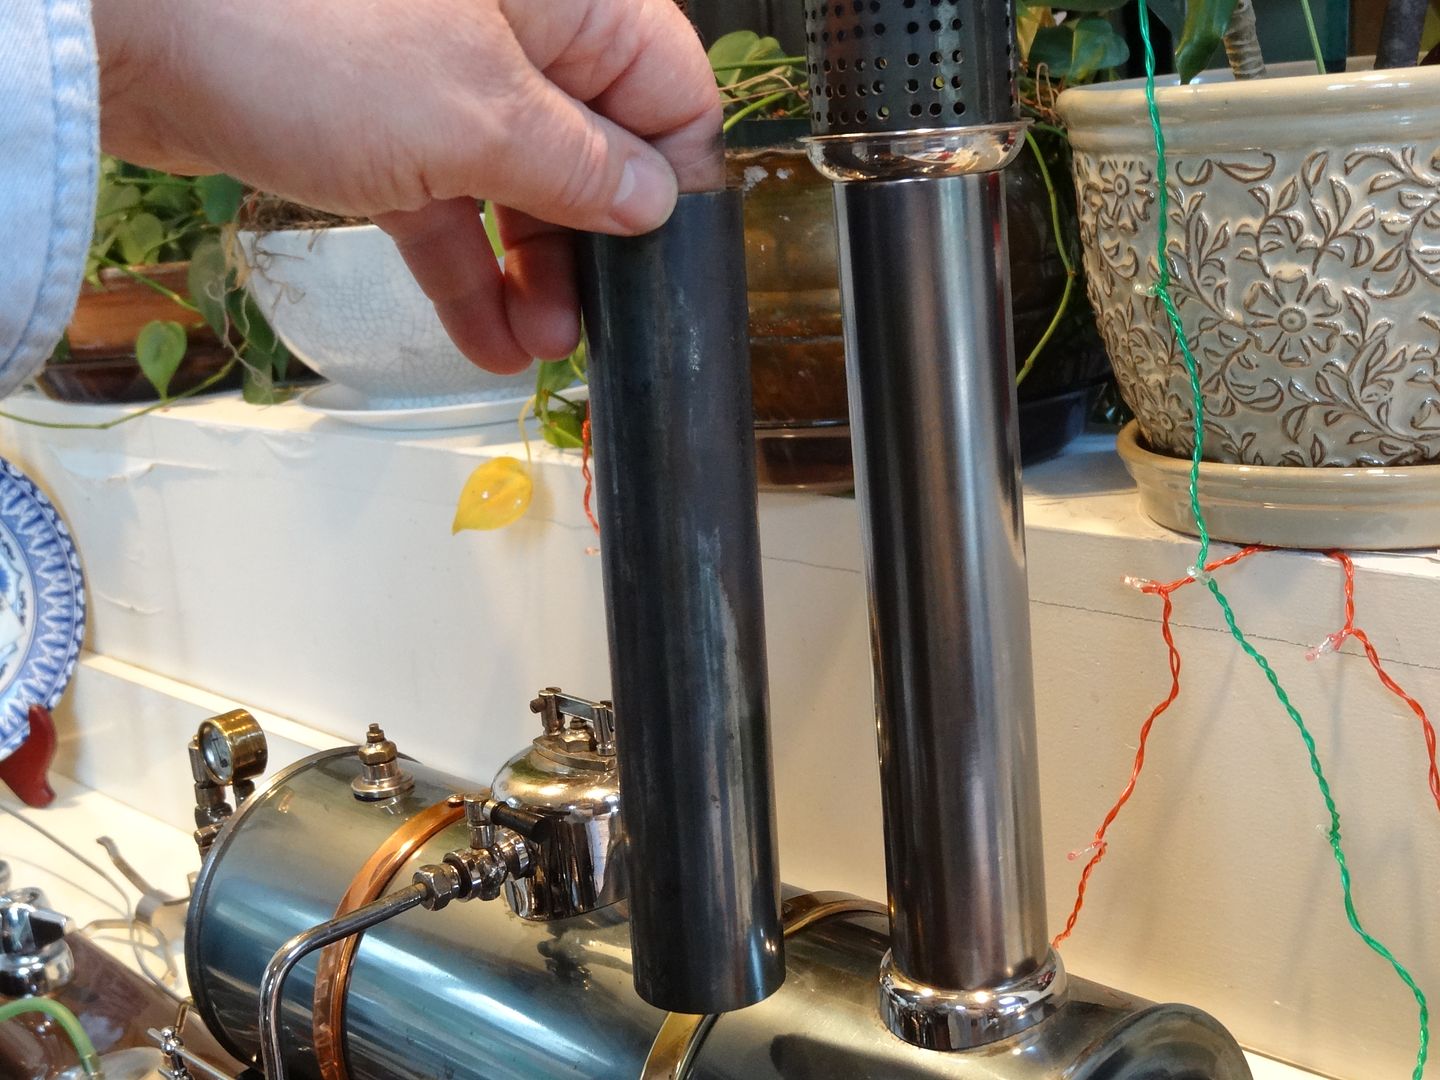
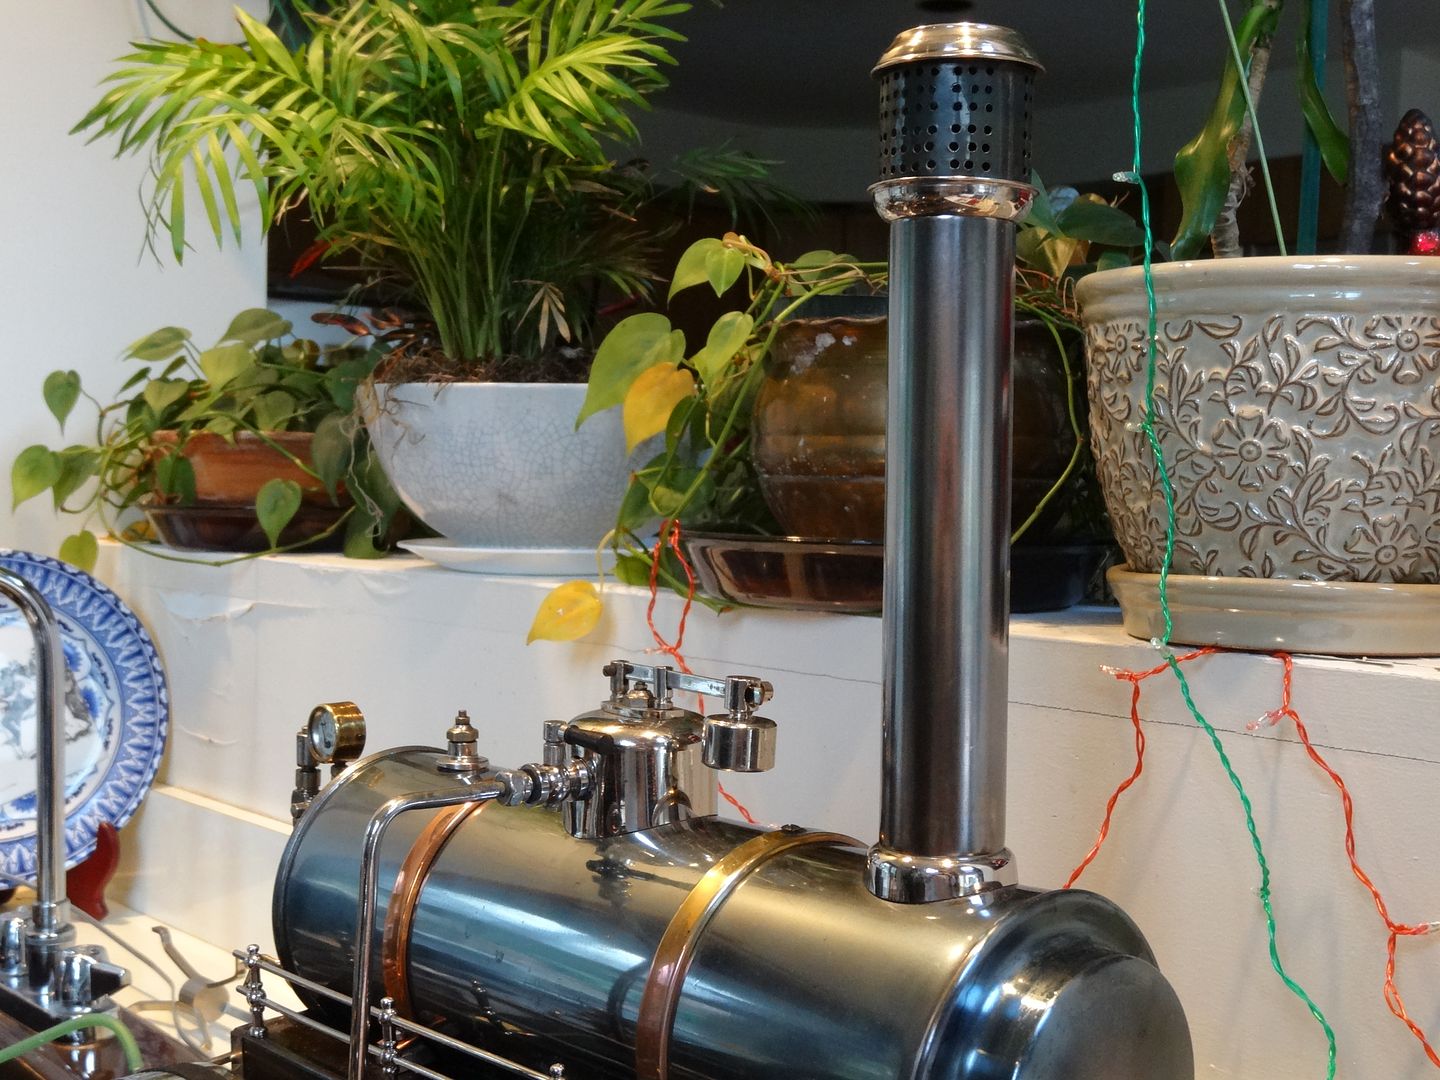
Here I have made a replacement chimney tube just for display. The original chimney will always
remain with this engine but since it was a little tatty I got a piece of brass tubing, polished it and
then experimented with some bluing/blacking solutions. I came up with a shade that while not
exactly the nice original Marklin blue that is on their steel parts, it is not too far off the mark
and pretty good for brass.
To get here I mixed a little Brass Black and Super Blue (for steel) together and
applied the mix gently with a chunk of 0000 steel wool soaked in it. (both from my local gunsmith shop)
Here are the pictures of it on the engine and I am holding the original chimney tube next to it.
It looks more grey with the original chimney next to it and more blue when by itself.
Gil

________________________________________
All times are UTC-05:00
Page 17 of 20


